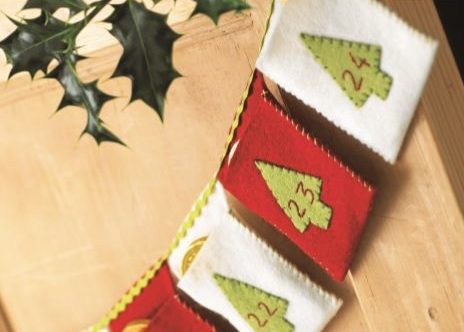
Get Crafting – Advent Garland

If you’re keen to have a home-made Christmas, then this is for you. A lovely countdown calendar to sew – and fill!
There’s been a definite trend over the years to make your own Christmas decorations, and this advent calendar is perfect. With an easy to follow method for a countdown calendar, you’ll soon be filling the little pockets with surprises galore!
You’ll Need
Materials
35 x 45cm (13¾ x 17¾in) of white felt
35 x 45cm (13¾ x 17¾in) of red felt
22 x 27cm (8¾ x 10¾in) of green felt
2m (2yds) of ric-rac or narrow ribbon
Red and green embroidery cotton
Tools
Paper, fabric and embroidery scissors
Pencil
Ruler
Paper
Embroidery needle
Dressmaking pins
Iron
Method
1 On the paper draw a 7 x 17cm (2¾ x 6¾in) rectangle and cut out. Holding the rectangle vertically, draw a line across 10cm (4in) down from the top. This will be your fold line.
2 Using this template, transfer the shape to the red and white felt and cut 12 of each colour. Mark the fold line with pins or a small pencil line at each end. Fold each pocket on the line and iron flat. Remove the pins.
3 On the paper draw a tree template 8cm (3¼in) high and 4cm (1¾in) at the widest point. Cut out, transfer to the green felt and cut out 24 trees.
4 With a very faint pencil line, draw a number on each tree from 1 to 24. Using your red embroidery cotton, stitch each number with back stitch.
5 Place one tree on the front of each pocket (the shorter side). Secure each tree in place with small overhand stitches.
6 Sew up the sides of the pockets with overhand or blanket stitch, hiding the starting knot inside.
7 Iron each little pocket flat. Line up all your pockets in the right order, keeping them very close together so they are almost touching. Take the ribbon or ric-rac and, leaving about 20cm (7¾in) at each end for the tie, pin on all the pockets along their top edge and stitch them in place with small stitches.
8 Tuck a little gift inside each pocket as a special treat for each day before Christmas.


